Customizing OS X—Part 2: Themes
Many of you will have read my previous article on customizing OS X’s icons using an application called CandyBar and I did, of course, promise that this week I’d go over how to change the overall theme of OS X—the creators of this next program couldn’t have said it better, “You don’t wear the same clothes everyday, your house doesn’t look exactly like your neighbor’s—why should the computing interface you use everyday be any different?”
Enter ShapeShifter
In essence, changing how your operating system looks won’t help you in getting your work done to a higher standard, it won’t aid you in finding what you’re looking for on Google any faster and it certainly won’t sort out any hardware problems you’ve got, but it does relieve that itching boredom of looking at the same thing every day, hence why many people get a kick out of finding a gorgeous theme to use on their system.
Step 1: Download and Install
The latest revision of ShapeShifter was released on the 11th of April 2006 and as yet, unfortunately, it’s not Universal, although Unsanity, the company behind it all, are quickly converting all their programs over to Universal applications as we speak. ShapeShifter requires Mac OS X 10.3 or newer, so many of you already on Tiger will be able to take advantage of this software. You can download ShapeShifter from the company website, or here for a direct download. It comes with a 15 day trial, in which time you can change themes as many times as you like, before having to fork out a rather cheap $20.00 for a license.
The installation process is relatively simple: First unmount the image as you would do with any .DMG file, and then click on the installation button. A handy wizard will be presented to you, which only requires you to hit the ‘continue’ button a few times. At some point you will be asked to install something called ‘SmartCrash’ reports—I’d recommend not installing this software as it seems a little too much like spyware for my liking, plus Apple has already built in a crash report program to the operating system. A few more screens along and you’ll be asked to install ApplicationEnhancer. If you haven’t already got a version installed, do so—it really helps the program with applying themes to applications on your system.
After installation is complete, SystemPreferences will load and you’ll then be asked to either log out or restart your computer for the settings to take effect. A simple log out is much faster and just as effective in this instance, so I’d suggest doing just that.
Step 2: Learning the features
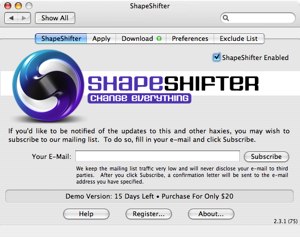
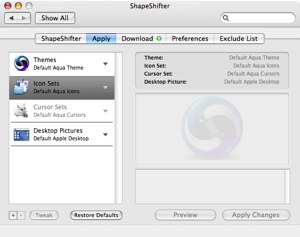
On first opening ShapeShifter you should see a screen similar to the one below. There are 4 other tabs in total at the top of the screen and they are:
Apply: This is where you will apply any themes you have downloaded on your system, you can also change desktop wallpaper, icon sets and cursor sets in this window. See screenshot
Download: Download is where you can directly download a handful of the most popular or newest themes available for ShapeShifter. You will sometimes also be presented with a list of applications that the theme is enhanced for, as well as any color variations it may have.
Preferences: I think this tab is rather self explanatory but it features a few options for you to fiddle about with. Fortunately, the default options are set up perfectly so there’s virtually nothing for anyone to do in here.
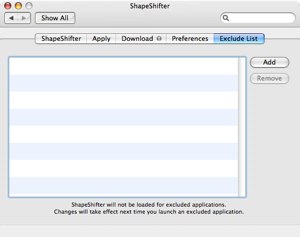
Exclude List: Don’t let the ‘exclude’ term worry you on this, it’s merely where you list applications you don’t want to be effected by theme changes. Perhaps you’d rather keep the default iTunes theme, or maybe you don’t want Mail to be changed full stop? You can enter both of these applications in the exclude list and they will not be tampered with during a theme change. See screenshot
Step 3: Locating themes
The whole process of locating and installing icons using ShapeShifter is so easy, it’s not worth talking about, but I must. Using the following websites as a starting point for many theme searches, locate a theme you’re interested in and then find a download link next to that theme. You’ll notice each theme has different characteristics to it, whether this be a combination of color sets, the inclusion of icons and cursor sets, or perhaps it has themes for certain applications that other themes have failed to look at—all should be listed on the download page for each theme. Hit the download link and in most cases ShapeShifter will pop up and you’ll see the download progress in there.
A few websites to get you started:
Of course, the other way of downloading themes is through the Download tab within ShapeShifter. The list of themes on offer here is rather minimal, but they are sometimes the most popular ones that appear. Hitting download will perform the same task as above.
Step 4: Installing themes
So, from Step 3, you’ve found and downloaded a theme you like, right? As I said, ShapeShifter will now begin the download within itself and then sort the themes into a list under the Apply tab.
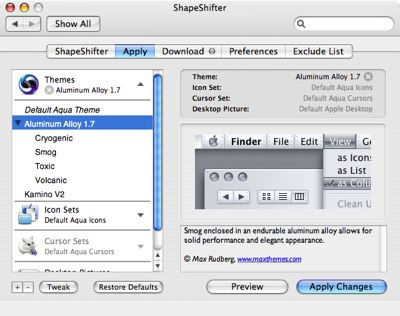
Now that we have a theme installed (but not yet applied), you can take a preview of it and its various color arrangements. To do this, expand the ‘Themes’ segment and you’ll see all the themes you’ve downloaded. Highlight the one you’re interested in, in my case I’ve selected Aluminum Alloy 1.7, and if expandable again, choose a color arrangement you’re interested in. The four on offer for my selected theme are ‘Cryogenic, Smog, Toxic and Volcanic’. You’ll also notice that as you highlight each theme/color arrangement, a preview to the right will appear. This gives you a better idea of what the theme will look like without having to constantly apply each one.
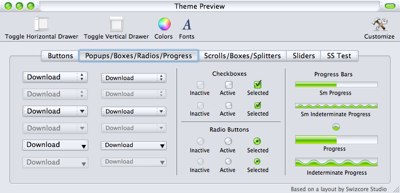
Now, you get a preview of each theme, but it’s a little too small to really appreciate how good (or bad) a particular theme is. Using the ‘Preview’ button, next to the ‘Apply Changes’ button, a small window will load offering you a quick preview of what buttons, loading bars, popup boxes and scroll bars etc. will all look like. You can never get a full understanding of what the theme will look like, but it’s as near as you’re going to get without actually applying the theme.
Once you’re happy with your selected theme and it’s color arrangements, begin the transformation by hitting ‘Apply Changes’. Depending on your systems power, it should take about 40 seconds or so to change theme, in which time your Dock and Finder will relaunch before seeing the sleek look of OS X change. A few things that should be pointed out at this time is that, until you have logged out and back in again, not everything will look spot on. Any applications you currently have open during transformation won’t be effected until they’ve been restarted, as well as some other areas of the operating system. It takes some time, which is why the ‘preview’ option is there.
So, once you’ve selected a theme you like, downloaded, installed and then applied, it’s now time to log out, log back in again and see the new theme for all its glory, which is exactly what I’ve done.
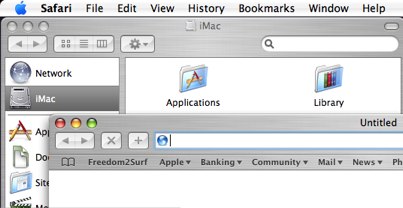
‘Before’
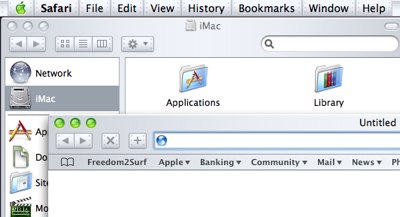
‘After’
Before proceeding to Step 5, I should quickly go over a couple of the other features available within ShapeShifter.
Under the Apply tab, you’ll notice when a theme is highlighted that a ‘Tweak’ button will become active. Tweaking a theme allows you to alter the core image and colors, for example, of certain themes. If you’re new to this sort of thing, then it really shouldn’t apply to you, it’s only for those who are feeling a little creative and want to expand on someone else’s work.
The Exclude tab is also pretty straight forward. As I mentioned before, if you don’t want a particular application to change theme when you’re changing the overall theme of the operating system, you just simply tell ShapeShifter and your beloved applications will not be touched. To do this, go to the Exclude tab, select Add, locate the application in the window that pops up, hit Add again and then your application will be sitting comfortably in the exclusion zone.
Step 5: (Optional) Reverting back to default (Aqua)
Okay, so perhaps you’ve decided after all that, applying a theme to your system isn’t your cup of tea, or perhaps you would just rather come back to it all later when you’ve got more time? ShapeShifter thankfully keeps hold of your original Aqua theme and allows you to easily restore. Go back to the Apply tab and locate the ‘Restore defaults’ button. Before hitting that, you should know that this will restore absolutely everything, your desktop wallpaper, icons, cursor sets and theme. It’s not difficult to reapply everything, but it will take some time, so only use this option if you want everything back as the way it was. The other way is to expand the ‘Themes’ segment again and select Default Aqua Theme. Once done, hit Apply Changes and you’ll quickly see everything return to normal. Once again, you’ll need to log out and in again to see changes in full.
Summary
A week ago most of the new guys and gals out there wouldn’t have had a clue how to change icons or themes safely on your Mac, but now you do. If you’ve followed the steps carefully, you should now have a different looking operating system to that of the one you were presented with when you first purchased your Mac. Why do people do it? As I said, most likely to cure an element of boredom of looking at the same thing every day, it keeps us interested in what we’re doing and there’s nothing like changing themes to how you’re feeling. After all, you change your desktop background occasionally, don’t you?
If you missed last weeks article on how to change icons within OS X, please click here.
 del.icio.us
 Digg
Digg Facebook
 Slashdot
 StumbleUpon

Comments
There are also some great themes that you can use that do not need Shapeshifter i.e PillowTalk, Aqua Extreme, Smoothstripes and Iridium. Aqua Extreme is my favourite and is currently being used at the moment :D.